
|
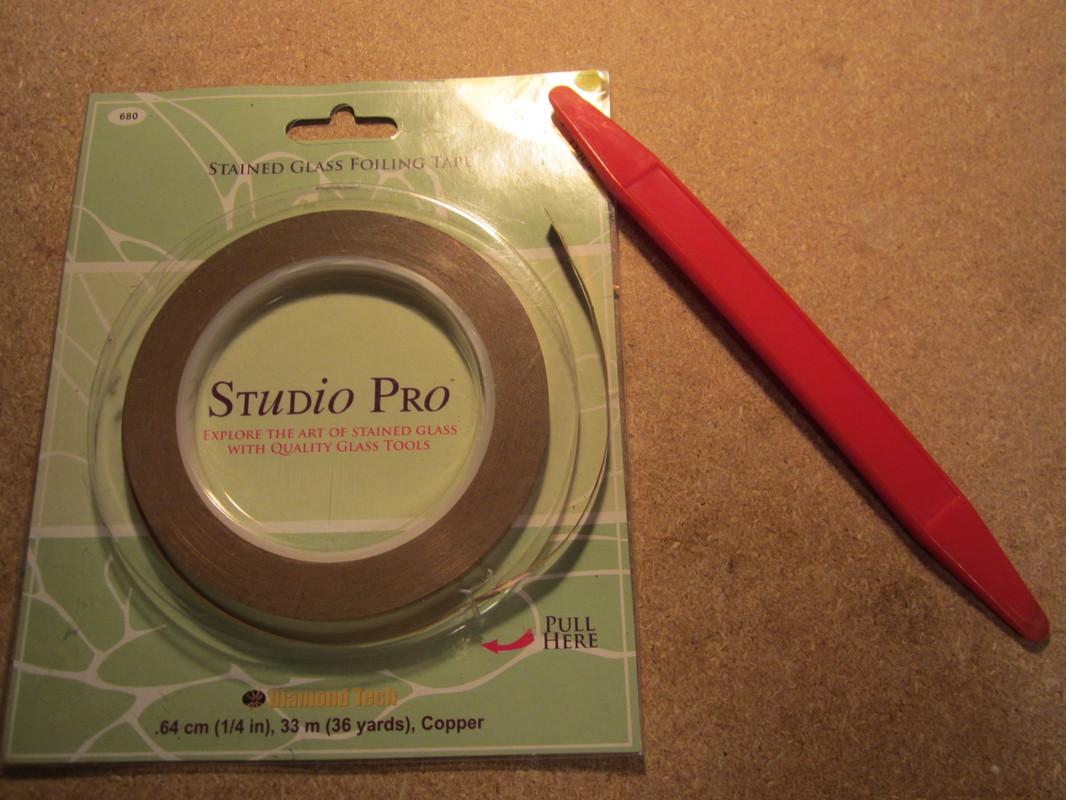
Step 5 Materials: Copper foil on a roll or sheets, a hard tool for pressing, and scissors
So first you need to make sure your glass is clean and dry. You can use water or glass cleaner. After that you need to select which copper foil to use. Some people use copper sheets and cut them to what they want. I have never tried it. I use different widths of copper foil that comes on a roll. Sometimes that also isn't thin enough for some of my designs, so I half to trim the edges. *Basically you want to select a copper foil that is wide enough to fold over both side of you glass around the edges, but not so much so that it take away from the design, especially on smaller pieces.
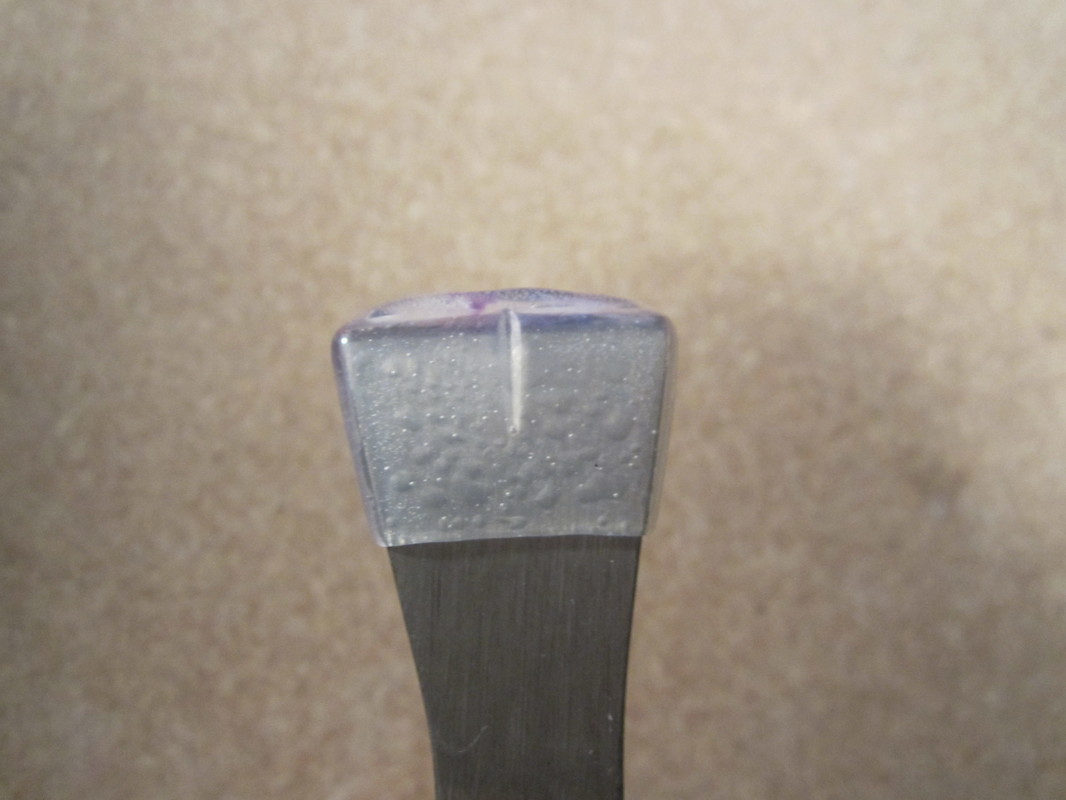
foil in the right spot, it will weaken the sticky part of the foil. Just do the best you can.* Firmly press with your fingers or on a table as you move around the piece. Once that is done, THEN you can press the sides down around the glass in the front and back of the piece.
After finger pressing, take your hard edge tool (mine is the long red plastic tool in the first picture) and press the sticker around the glass until every spot is firmly secured. This will save you in the next stage: soldering.
0 Comments
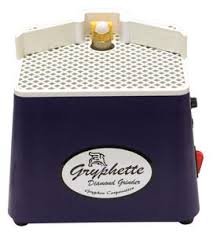
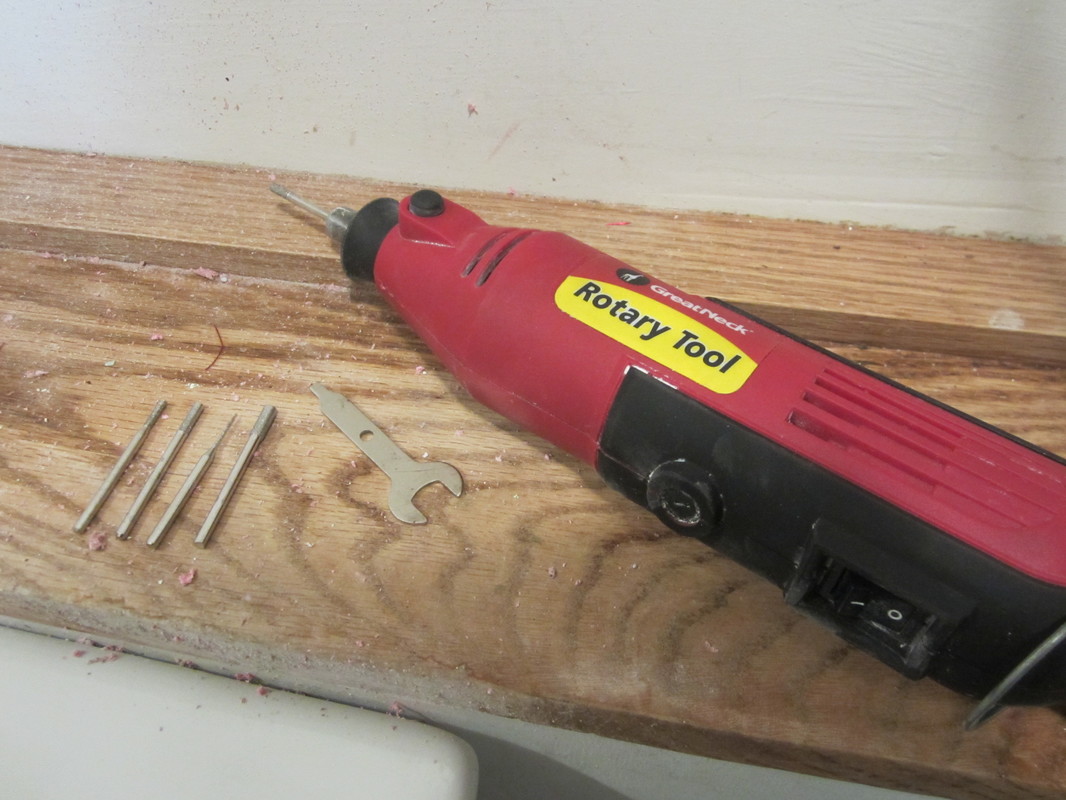
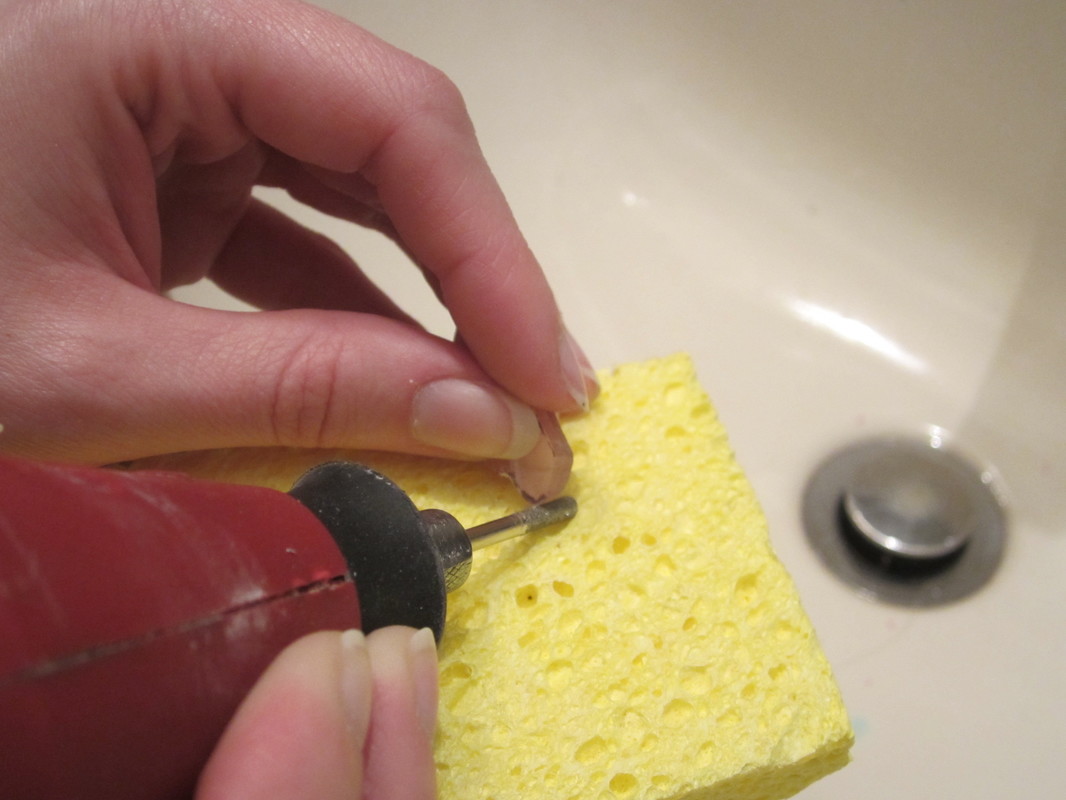
Step 4 Materials: diamond bits, grinder or rotary tool, sponge, safety glasses, safety gloves, face mask
tool and the diamond bits are cheaper than a big grinder. That being said, if you plan on making sun catchers, then you are better off with the big grinder because your pieces will be larger and the bits are larger. when you grind with a glass grinder you place the piece of glass flat as you grind off the edges, making the edges easier to fit together. Using a rotary tool, you are carving by hand and the edges will typically end up more rounded and bumpy.
Most of the time you will need to grind your piece unless you get very good at the previous stage of cutting and you are only doing straight lines (but that wouldn't be very exciting). Grinding glass is dangerous because you can inhale the glass dust, get glass in your eye, or cut yourself, so please wear all the safety equipment. However, i consider this the most important stage; not my favorite, but the most important because this will really determine the final outcome of your piece. The grinder is your tool and your medium is the glass almost like a sculpture with their chisel and slab of marble so take your time to get it right. It helps if you can still see the sharpie marks on the glass. To grind the glass with a grinder: fill the bottom with water and put in the sponge as the directions tell you. When you turn it on, place the piece of glass down flat and push it up to the side of the diamond bit. Don't push too hard because it wears off the diamond coating on the bit faster. *If the bit turns white then the sponge is not touching the bit like it is supposed to to take the glass dust off.
your glass. It is best to move the glass against the bit and not move the bit around the glass because your hand can slip easily and scratch the front of your piece. I have done this so many times and it is so frustrating because you have to start over because the scratch won't come out.
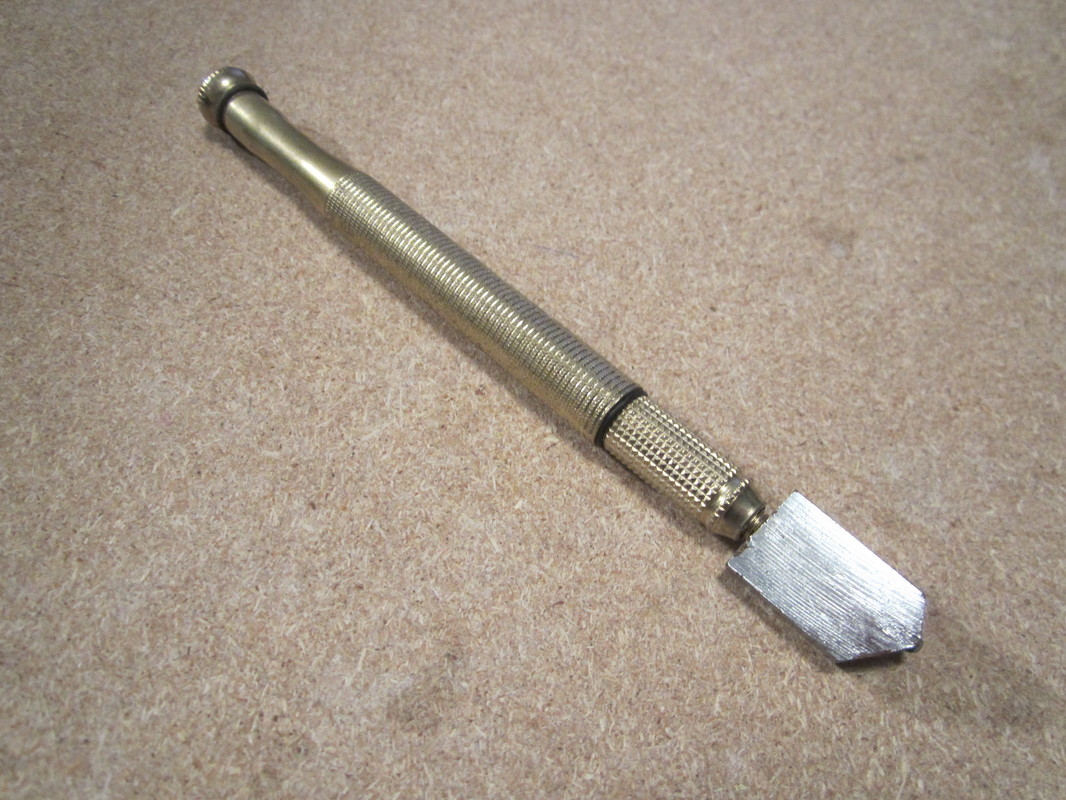
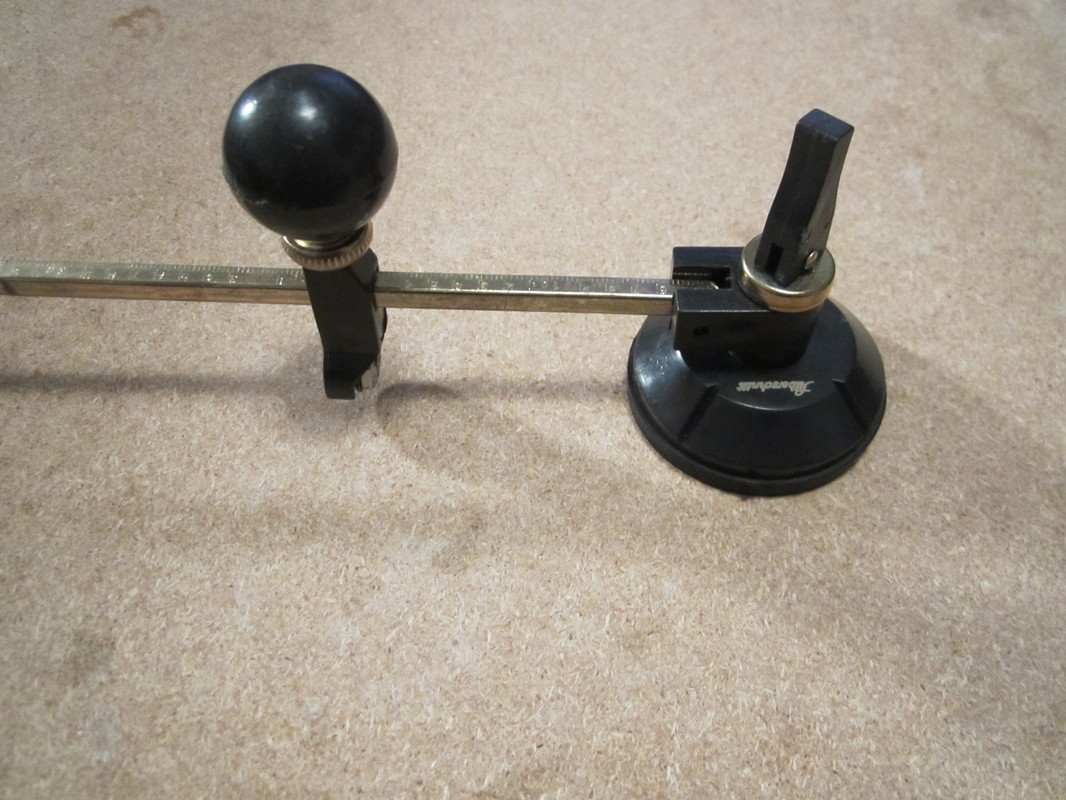
****Also be very careful and mindful that you are working with electricity and water so don't stick the body of the rotary tool under water and try to keep your hands as dry as possible if you don't wear gloves. Once you have achieved a result you are pleased with, make sure to clean up your work area and clean all the dust off your glass with water or glass cleaner in preparation for the next step: copper foiling. Step 3 Materials: glass cutters, glass breaker, glass cutter oil, working gloves, and protective glasses So now that we have our design traced on our glass, the next step is to cut it out. *This stage is very important in determining how much time you will spend in the next stage.* I have come across three different glass cutting tools:
I prefer the pistol glass cutter because it is the easiest to use and hold. So you take your glass cutter and you want to cut out your shape along or as close to the lines you have drawn as possible. This will be harder with curved edges. *You have to be very careful because if your curves are too deep and you attempt to break the glass, you may break through your design and have to start over, You are better off only curving in a little and make up for the rest you couldn't get in the next stage.* 
**Take note: stained glass thickness can vary and this will play a significant role in the glass breaking process. I have had glass that is pretty thick compared to the average (typically it's opaque glass) and they do not break very well. In this case you will want to leave extra room around your piece if there are curves in it because the glass is more unpredictable when breaking and it will more than likely break your design and you will have to start over. If you feel you are having trouble breaking the piece, then just leave the excess on and you can take care or it in the next stage.** Once all your pieces are cut, we can move on to stage four: grinding the glass.
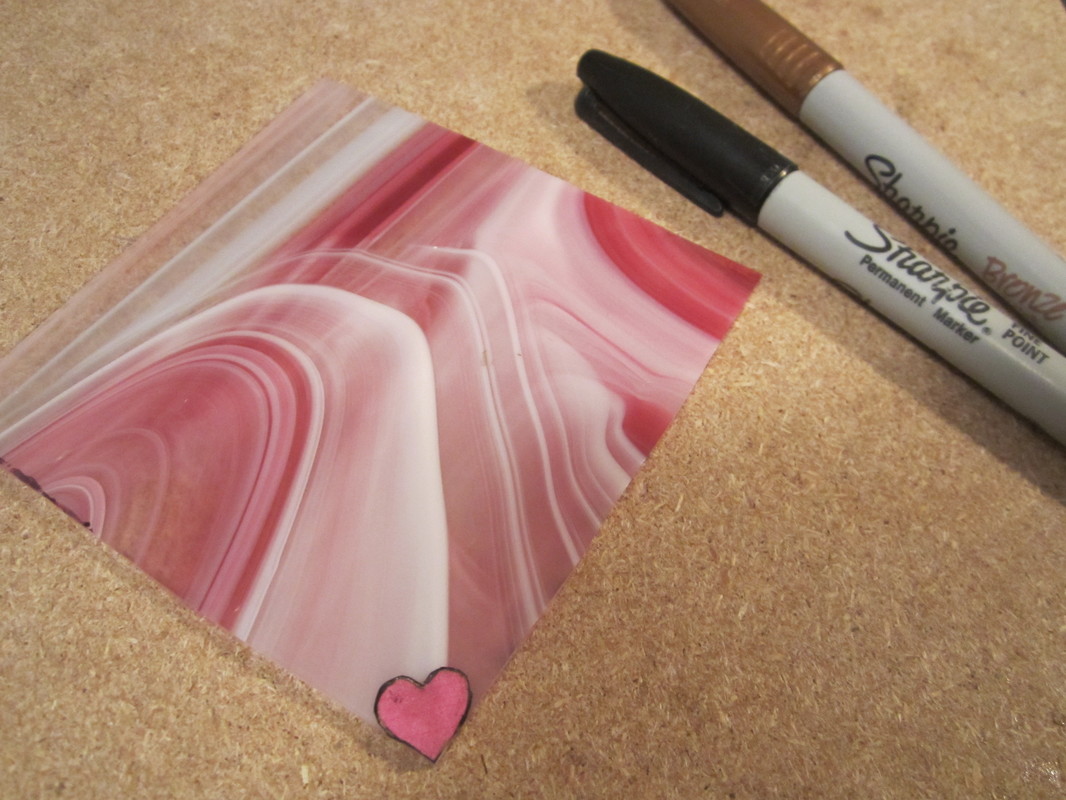
Also here is a link to a Youtube video that shows how to use the circle glass cutter. It really is a great tool There are a lot of steps to making stained glass pieces and it is pretty pricey to get started. Here I will go through the steps to making a stained piece, tips i've learned, and tools you will need and don't need. Step 1 Materials: Paper, pencil/pen, and scissors So to begin you need a design to work with. It can be something as simple as a rectangle or heart or it can be a sun catcher that has many pieces. Choose whatever you are into at whatever level you are at. In this case I am going to use little heart charms that I make and sell in my shop. You need a physical template to work from so whatever design you choose you either need to draw it out or find it online (that isn't copyrighted) and print it out. I do a mixture of both depending on what design I want. In this case I printed my out and then cut it out so i can do the next step, which is trace it onto my glass.t. 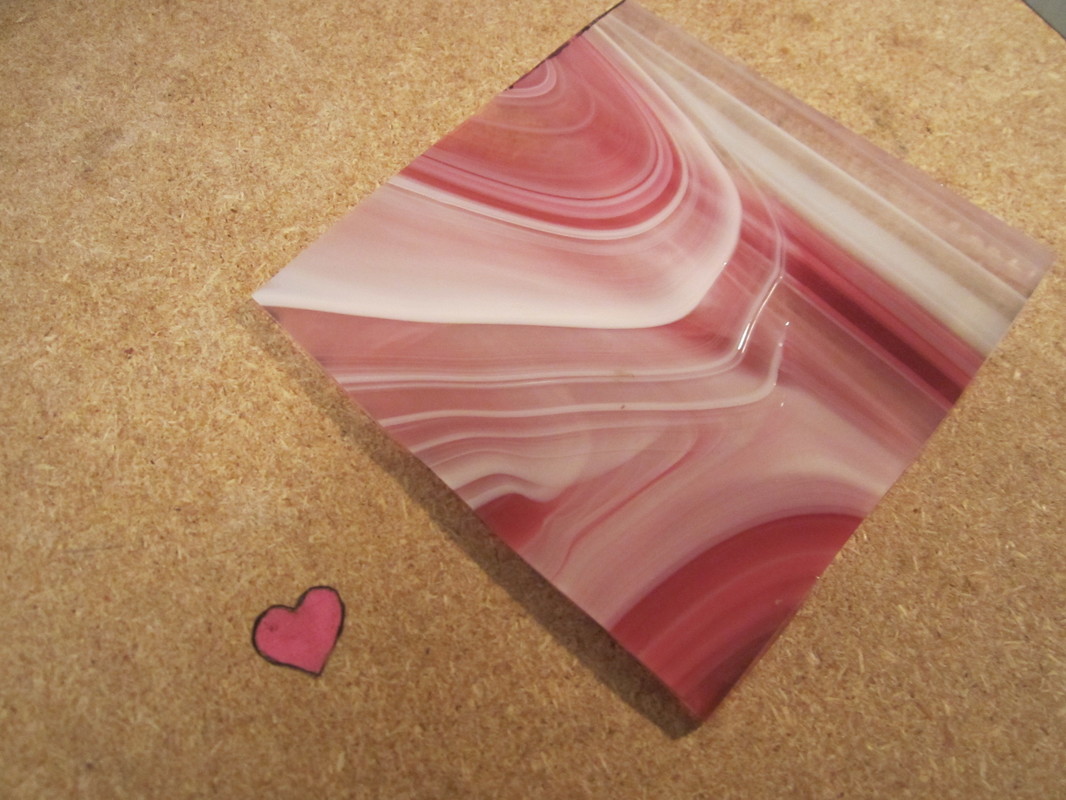 Step 2 Materials: Glass in your desired colors and a sharpie
|
KimI am a huge animal lover, going through college, and love to create. That's about it. Archives
August 2017
Categories |


 RSS Feed
